Eating Well – My postpartum weight loss lifestyle change

Share Button

We all struggle with our weight, whether it’s losing or gaining. Getting married seemed to bump things up a notch and carrying our first baby led to some “changes” too. At 215 lbs in my hospital bed, the delivery nurse asked me how much I weighed and I kept saying “115” to which she responded, “I don’t think so.” This was probably part labor brain and mostly the fact that I had never been over 200 lbs in my life.

At 4 months postpartum today, I weigh 188.2 lbs and am steadily losing thanks to some eating changes we’ve made in our home.

Learning from the past

3 years ago after realizing I’d gained some weight during our first year of marriage I did really well at losing 10 lbs over 4-6 months, reaching 166 lbs. I remember feeling so good about myself. I got there the usual way, exercising more and eating less, but I honestly still wasn’t eating the right foods. Carbs were my staple which fill you up fast and equal a TON of calories. I’m no nutritionist but this time around I wanted to look into other options. Obviously getting some veggies in there was the right thing to do, but it wasn’t until I read this article, “How to Lose Weight Fast: 3 Simple Steps, Based on Science” that I was finally ready to take the plunge and make some changes.

Key Scientific Takeaways

According to the article above, the scientific approach to losing weight involves a diet of protein, vegetables and fat and dropping sugar and carbs altogether. Basically: Paleo + Dairy. You can read the article to learn more about why they say fat’s “ok” and thoughts on fruit, but my main takeaway was that protein boosts your metabolism and eating less carbs, lowers your insulin levels, making it easier for fat to be release from fat stores and used as energy. When we eat tons of carbs, our body burns that for energy and adds the rest to our current store of fat cells (woot!).

Now carbs doesn’t just mean bread, nope sorry friends, it also includes, corn, potatoes and other starchy veggies (suddenly the cauliflower rage is making sense).

53 Days and Going Strong!

We’ve been making this lifestyle change as a family for about 53 days now and I’ve gone from 198 lbs to today’s 188.2 lbs. A chunk of that weight loss at the beginning was water weight – which you can read more about how that works in the article, but the rest has been a steady decrease of about 1 – 1.5 lbs a week and it’s been amazing. I haven’t even started phase 2 yet! (actually exercising) 😉 .

I’d say my favorite part of eating this way is actually feeling full and under my calories because there are no carbs in my pantry calling to me and I’m finally stocking my fridge with vegetables. On the calorie note too, you don’t actually have to count them. I just do sometimes as I’ve been tracking my journey through the free version of MyFitnessPal. When I do track, they’re always naturally low because of all the veggies. I say “naturally” because I’m literally making no effort to keep them low, just eating veggie and protein based meals. Carbs are seriously calorie hogs!

So do you not go out with friends anymore?

I will mention that our new meal plan has not made us social outcasts when it comes to food and friends 😉 we do eat carbs and sugars on the weekends and have had a few cheat meals throughout the weeks now and then (last week was my birthday and I went a little nuts). I will still try a recipe that calls for a bit of bread crumbs or a tablespoon of flour to thicken a sauce, and I love that we eat this way because it helps us to balance things, indulge now and then and it’s also diversified my recipe repertoire!


Upcoming Weekly Recipe + Grocery Lists!

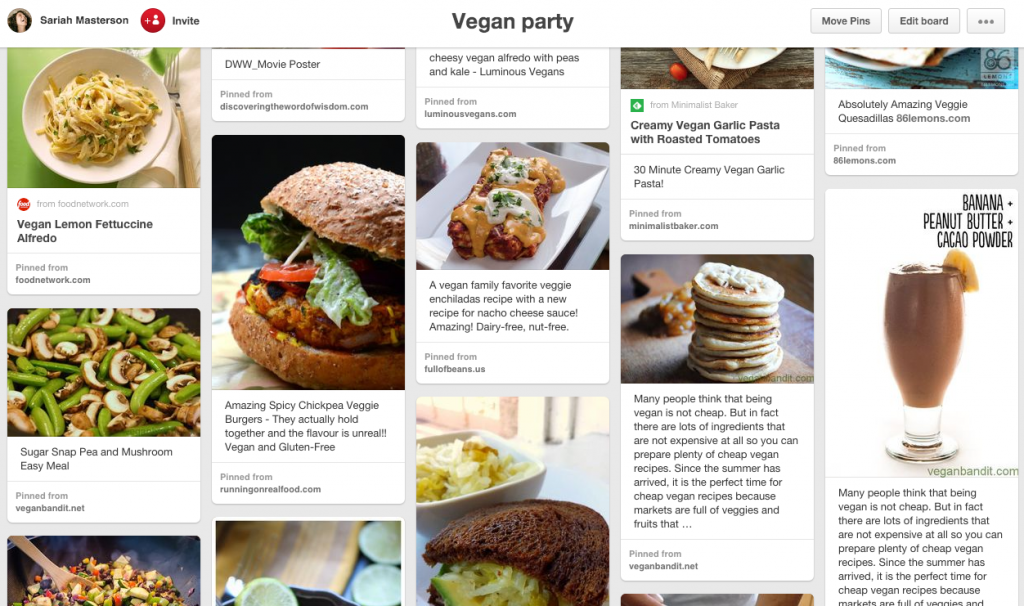
On the note of recipes – I’ve been exploring Pinterest mostly and have found myself getting into a really good habit of planning out the month’s meals and even creating grocery lists for myself ahead of time. We’ve been rating the meals too using Pinterest’s new “Try” option (good idea by the way guys!) and curating some future staples (here) as this is not a diet, but a lifestyle change – it’s important to think in those terms.

When my sister in-law asked about what we ate, I told her I’d share my lists with her – which led me to the idea, “Why don’t I just make that a regular feature on Good Morning Susan?” And so following this post I’ll start writing a weekly update on our new Low-carb/Paelo+Dairy journey, what we ate, what was yum and what was gross and what to buy if you’re down for giving it a shot too. I’ll try to include my progress in those posts as well and am curious to see how eating better will benefit my liver for the next pregnancy – in a few years 🙂 .

Share Button

Use Facebook to Comment on this Post

Vegan Garlic Pasta with Roasted Tomatoes #eatingvegan

Share Button

creamy vegan pastaI don’t know what cooking vegan would be like without almond milk and it’s the number one ingredient that makes this dish as creamy as the Minimalist Baker describes it. I only have one recommendation for this recipe and that’s trusting her when she says “add a healthy pinch of salt” and going out and getting some shallots. We didn’t have any in the house so I added more garlic, which wasn’t bad, but I think some shallots would have added more to the flavor.

This meal was quick, easy and delicious. Try it yourself here.

Share Button

Use Facebook to Comment on this Post

Creamy Roasted Tomato Soup #eatingvegan

Share Button

16 roasted roma tomatoes

Trying vegan recipes is pretty much changing my life and my stomach. I have to say my most favorite discovery to date is the magic of roasting tomatoes. It brings out this amazing flavor you would not believe! And for that reason alone, trying vegan or not you absolutely have to make this recipe from Ceara’s Kitchen. It truly is “the Best Creamy Roasted Tomato Soup” – with some of my own modifications of course 😉

Creamy Roasted Tomato Soup
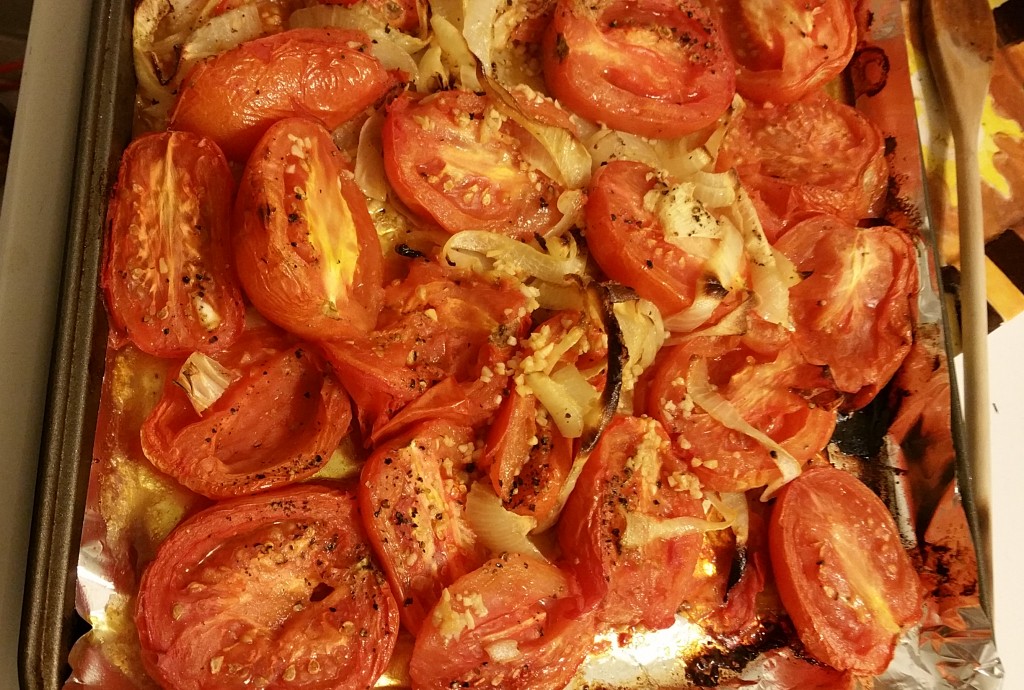
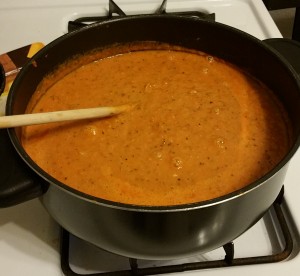
To begin with it calls for hot sauce. #1 why? and #2 no. Totally dropped that ingredient. I also ended up not doing the bay leaves because they were hidden in my spice drawer – but I’m definitely trying them next time. The overall taste of the final soup was a bit sour so I added too much brown sugar, which in turn led me to add more salt and garlic salt because I couldn’t quite smell the garlic enough either.

Thing’s I’d do differently? Try the bay leaves, still add salt to taste, maybe one or two more garlic cloves and tripling the maple syrup over adding brown sugar.

This meal was sorely lacking in bread, which was totally my fault because I killed my yeast, but alas there’s always next time — and I can promise there will be a next time because this soup was delicious!!


Share Button

Use Facebook to Comment on this Post

My easy trick to eating more vegetables

Share Button

Discovering the Word of WisdomSome friends of ours mentioned a diet to Alex that might help with the tendonitis in his hands. It’s based off the book, “Discovering the Word of Wisdom” which to those non-LDS readers out there, is life-style based doctrine that was revealed to Joseph Smith through the 89th section of the Doctrine and Covenants. The Word of Wisdom is why as a member of the Church of Jesus Christ of Latter-day Saints I don’t drink alcohol, coffee or strong teas. Because of this revelation I also don’t smoke or use recreational drugs.

The Word of Wisdom also encourages eating fruits and vegetables in season and partaking of meat sparingly. Not that eating a strawberry in the winter is sinful, or that a burger can kill you, but we are promised that if we partake of food in this way, we will be healthy and strong.

Interestingly enough, this spiritual guidance towards how we should treat our physical bodies, falls in line with many scientific discoveries and recommendations towards eating healthy, which is another reason why our friends thought the book “Discovering the Word of Wisdom” and actually trying a little harder to follow the Word of Wisdom might help with Alex’s hand pain. To be quite frank, sometimes all the garbage we fill our bodies with (like the two handfuls of keebler fudge cookies I ate today) can really mess us up and lead to symptoms from never ending back pain to swollen tendons that we’d never think were so connected to what we eat.

So to keep a long story short, we’re trying a version of the Word of Wisdom diet by eating vegan meals during the week and taking breaks now and then for meat and cheese on the weekends and at social gatherings. It’s not something I believe everyone has to do, but for us it’s working and I’m feeling better and better everyday. Not that I had any ailments before, but I’ve noticed that I don’t crave food as much, my body is starting to feel satisfied and maybe that’s because it’s finally getting what it needs: essential vitamins from fruits and vegetables that I can’t get anywhere else (besides multivitamins, but lets be honest, those make most people, including me, sick).


Vegan Party


I love the vegan approach to this mostly because it’s introducing me to new flavors and recipes and better ways to eat plants. I’m definitely NOT a raw carrots kind of girl and plain cauliflower can be soooo boring. Also I hate ranch on raw veggies (that stuff’s meant for pizza duh…). But turn my veggies into a stir fry or pasta dish and you’ll have me running to the table. If you don’t believe me, give it shot! I challenge you to try at least 3 vegan recipes over the next month. They can be for any meal: dessert, lunch, dinner (don’t tell me you haven’t been eyeing that banana, peanut butter, cacao shake above. CACAO=PURE CHOCOLATE). Make a dish, try it and tell me about it in the comments!

Not sure where to start? Check out my “Vegan Party” Pinterest board. I pin tons of recipes and have tried most of them.

Oh and one last thing! I won’t deny that the idea of eating vegan food still weirds me out. Especially with the stereotypes about vegan food we’re all familiar with: “It’s nasty” “Boring” “But where’s the cheese?!!!” To help me overcome my very often false assumption that something is going to be gross before I even try it, I focus on referring to what I’m making by familiar names instead of vegan names. This isn’t a vegan rueben sandwich, it’s an avocado rueben! We’re not having vegan french toast for breakfast, it’s just french toast or coconut banana french toast

Seriously you have to try the french toast (forgive her for leaving vegan in the title):

Vegan French Toast

PS: Acai bowls are TOTALLY VEGAN!!

Share Button

Use Facebook to Comment on this Post

Plan on GobbleGobble.com for Christmas dinner!

Share Button

Greenberg Turkey at my door

This year we ordered our turkey from GobbleGobble.com and it was amazing. You may have heard of these birds by their more formal name, Greenberg,  but I still can’t get over whoever was bright enough to purchase that domain name asap. #genius

Left over thanksgiving dinner

Ali grew up with Greenberg turkeys and insisted that for our first Masterson family Thanksgiving we purchase one. I was skeptical at first because this meant seriously relying on a company in Texas to pick, smoke and ship us our turkey on time and in good condition. Not to mention the photos on the site showed blackened birds on the dinner table – I can’t serve burnt food! Not to worry though, smoked turkeys have to get a little black sitting in, well smoke right? And you’re not supposed to eat the skin. 😉

Left over turkey

To finish off a brief post written in my car on the way to Rite Aid (WordPress mobile app) I have to say I LOVED my Greenberg and highly recommend ordering one for Christmas dinner. It’s flavorful to the bone, required little to no prep and costs comparably close to basting and cooking your own bird. Make more time to spend with your family this Christmas. Plan on a Greenberg turkey.

Share Button

Use Facebook to Comment on this Post

Really Good Carmel Corn – Crystal T.

Share Button

This carmel corn recipe is to die for and oh so easy. I made it one night in our glass Kitchen Aid bowl — which was super useful because it has a lid (that way I could stop myself from eating).

Crystal's Carmel Corn

Really Good Carmel Corn -By Crystal T.

1/4 cup Butter/Margarine

1/2 cup Karo Syrup (Corn Syrup)

2 cups Brown Sugar

1 Large bowl of air popped pop corn

Melt butter and add syrup and sugar. Boil for 1 minute. Pour over the popcorn a little at a time while stirring the popcorn. Allow to cool and enjoy!

Share Button

Use Facebook to Comment on this Post

Philadelphia Marble Pumpkin Cheesecake – Ah! Delicious

Share Button

I think this pumpkin cheese cake was the first thing Alex and I made with our Kitchen Aid. It was delicious and we’ve made it at least once or twice more since. I’m definitely keeping this recipe as a staple. We found it of course at AllRecipes.com. You can follow the link or find it below. PS: it’s super easy!!

Marble Pumpkin Cheesecake


Philadelphia Marble Pumpkin Cheesecake

Crust Ingredients:

18 Ginger Snaps

1/4 cup Finely Chopped Pecans

1/4 cup Butter (Melted)


Cheesecake Ingredients:

3 (250 g) Packages of Cream Cheese

3/4 cup Sugar, Dived

1 tsp Vanilla

3 Eggs

1 cup Canned Pumpkin

1 tsp Ground Cinnamon

1/4 tsp Ground Nutmeg

1 dash Ground Cloves

Directions

  1. Heat oven to 350 degrees F. Combine cookie crumbs, pecans and butter. Press onto bottom of 9 inch springform pan.
  2. Beat cream cheese, 1/2 cup of the sugar and vanilla with electric mixer until well blended. Add eggs, one at a time, mixing on low speed after each addition just until blended. Remove 1 cup plain batter; place in small bowl. Stir remaining 1/4 cup sugar, pumpkin and spices into remaining batter. Spoon pumpkin batter into crust; top with spoonfuls of reserved plain batter. Cut through batters with knife several times for marble effect.
  3. Bake 45 minutes or until centre is almost set. Cool completely. Refrigerate 4 hours or overnight. Cut into 12 slices. Store leftover cheesecake in refrigerator.

Share Button

Use Facebook to Comment on this Post

Pumpkin Chocolate Chip Cookies – Shelle H.

Share Button

My freshman year of college I had a roommate named Shelle. She was an amazing baker and loved to make pumpkin chocolate chip cookies. I of course, loved to eat them. Baking was a de-stresser for Shelle so we definitely were surrounded by goodies during finals. I was lucky enough to get a copy of Shelle’s pumpkin cookies before moving out and had the pleasure of making them last month. They were soft, gooey and delicious. You really can’t pass up this opportunity to try them yourself.Pumpkin Chocolate Chip Cookie DoughDelicious

Pumpkin Chocolate Chip Cookies – By Shelle H.

1 cup Canned Pumpkin

1 cup White Sugar

1/2 cup Vegetable Oil

1 Egg

2 cups Flour

2 tsp Baking Powder

2 tsp Cinnamon

1/2 tsp Salt

1 tsp Baking Soda

1 tsp Milk

1 tbs Vanilla

2 cup Chocolate Chips

1/2 cup Walnuts

Preheat oven to 350 degrees farenheit. Combine pumpkin, sugar, oil and egg. In a separate bowl stir flour, baking powder, cinnamon & salt. Disolve baking soda in the milk and stir into the flour mixture. Then add to pumpkin mixture and stir well. Add vanilla, chocolate chips and nuts. Drop by spoonfuls onto cookie sheet. Bake for 10 minutes or till lightly brown and firm.


Share Button

Use Facebook to Comment on this Post

My first loaf of bread

Share Button

I decided tonight that it was finally time to start posting to my “Kitchen Aid” corner. The next few posts will mostly be photo posts with a few comments. There is only so much you can say about baking with a Kitchen Aid…you put the ingredients in, mix it up, and bake. I just realized though, that recipes would be nice to add, so I’ll include those too. This might just turn into a kitchen corner!! -Who’s excited? Sariah's first loaf of bread: mmmm

One of the first things I made with our kitchen aid was my first loaf of bread. My friend, Kayla, showed me and I realized that it’s really not that hard. The key is to have quiet feet while the bread is baking. This keeps it from falling. I don’t know why, but fresh bread always seems to taste better than store bought.

Easy Bread – By Kayla M.

1 1/2 cup Warm Water

1 tsp Yeast (Active Dry)

1 1/2 tsp Salt

3 tbs Sugar

2 tbs Butter/Margarine (Softened)

4 cups Flour

Combine all ingredients in mixer. Mix until fully incorporated. Knead into desired shape. Place in greased bowl, with a damp towel over it to rise until double in size. When doubled in size, punch down the dough and knead out the bubbles. Shape into loaf and let it rise one more time until double in size. Place in a greased pan and bake for 30 min at 350 degrees farenheit.

Share Button

Use Facebook to Comment on this Post

Chocolate Flour-less Cake w/ Ganache

Share Button

Alex and I tried a new recipe a a few months ago for Chocolate Flour-less Cake.  It was a classy choice and included a lovely ganache topping.  We loved it so much we made it twice and used the left over cream for whipped topping on waffles–but this post is about the cake.  We found the recipe at FoodNetwork.com and this is how it turned out:

It was deliciously rich, so we served it with chocolate chip vanilla ice cream. It would have been perfect with raspberries too if you have some.  The best part is that it’s gluten free!

By Sariah Burdge

Share Button

Use Facebook to Comment on this Post