My easy trick to eating more vegetables

Share Button

Discovering the Word of WisdomSome friends of ours mentioned a diet to Alex that might help with the tendonitis in his hands. It’s based off the book, “Discovering the Word of Wisdom” which to those non-LDS readers out there, is life-style based doctrine that was revealed to Joseph Smith through the 89th section of the Doctrine and Covenants. The Word of Wisdom is why as a member of the Church of Jesus Christ of Latter-day Saints I don’t drink alcohol, coffee or strong teas. Because of this revelation I also don’t smoke or use recreational drugs.

The Word of Wisdom also encourages eating fruits and vegetables in season and partaking of meat sparingly. Not that eating a strawberry in the winter is sinful, or that a burger can kill you, but we are promised that if we partake of food in this way, we will be healthy and strong.

Interestingly enough, this spiritual guidance towards how we should treat our physical bodies, falls in line with many scientific discoveries and recommendations towards eating healthy, which is another reason why our friends thought the book “Discovering the Word of Wisdom” and actually trying a little harder to follow the Word of Wisdom might help with Alex’s hand pain. To be quite frank, sometimes all the garbage we fill our bodies with (like the two handfuls of keebler fudge cookies I ate today) can really mess us up and lead to symptoms from never ending back pain to swollen tendons that we’d never think were so connected to what we eat.

So to keep a long story short, we’re trying a version of the Word of Wisdom diet by eating vegan meals during the week and taking breaks now and then for meat and cheese on the weekends and at social gatherings. It’s not something I believe everyone has to do, but for us it’s working and I’m feeling better and better everyday. Not that I had any ailments before, but I’ve noticed that I don’t crave food as much, my body is starting to feel satisfied and maybe that’s because it’s finally getting what it needs: essential vitamins from fruits and vegetables that I can’t get anywhere else (besides multivitamins, but lets be honest, those make most people, including me, sick).


Vegan Party


I love the vegan approach to this mostly because it’s introducing me to new flavors and recipes and better ways to eat plants. I’m definitely NOT a raw carrots kind of girl and plain cauliflower can be soooo boring. Also I hate ranch on raw veggies (that stuff’s meant for pizza duh…). But turn my veggies into a stir fry or pasta dish and you’ll have me running to the table. If you don’t believe me, give it shot! I challenge you to try at least 3 vegan recipes over the next month. They can be for any meal: dessert, lunch, dinner (don’t tell me you haven’t been eyeing that banana, peanut butter, cacao shake above. CACAO=PURE CHOCOLATE). Make a dish, try it and tell me about it in the comments!

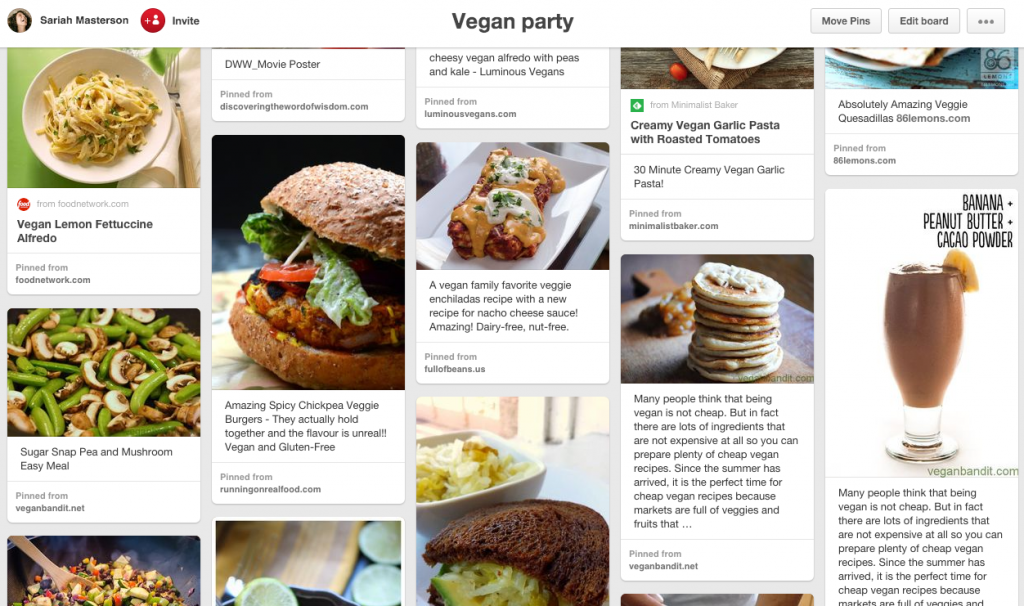
Not sure where to start? Check out my “Vegan Party” Pinterest board. I pin tons of recipes and have tried most of them.

Oh and one last thing! I won’t deny that the idea of eating vegan food still weirds me out. Especially with the stereotypes about vegan food we’re all familiar with: “It’s nasty” “Boring” “But where’s the cheese?!!!” To help me overcome my very often false assumption that something is going to be gross before I even try it, I focus on referring to what I’m making by familiar names instead of vegan names. This isn’t a vegan rueben sandwich, it’s an avocado rueben! We’re not having vegan french toast for breakfast, it’s just french toast or coconut banana french toast

Seriously you have to try the french toast (forgive her for leaving vegan in the title):

Vegan French Toast

PS: Acai bowls are TOTALLY VEGAN!!

Share Button

Use Facebook to Comment on this Post

How to decorate for a classy Halloween party

Share Button

12197337_10153198784596658_1549440504_oWhile we only had one little turtle stop by to Trick-or-Treat, he was still adorable. Especially when after saying “Trick-or-Treat” and me taking a while to get the candy bowl, he started stepping into the house asking, “Where’s my treat?”, all while the mortified father patiently repeated, “We don’t do that buddy…we don’t walk into their house…”.

It was adorbs.

I had honestly been planning Halloween since September not really for any particular reason, but more because I just love a good project. You can find all the inspiration for my ideas and actually most of the products I used per my Pinterest board: “A Halloween Movie Scare”.

Step 1: Picking a Theme

My goal for this event was something a little formal, cute and anything but gory. I found just what I was looking for after some Pinterest Pinning, internet shopping and of course browsing for deals. Zazzle.com was my final choice for invitations mostly due to a 20% OFF sale, which they seem to have a lot of.

12170041_10153181654746658_432447381_oStep 2: Invitations

While my invitations did come with their own envelopes (which I didn’t realize when I ordered them), I wanted something a little more interesting than plain white. I came across the brown ones at Jo-Ann’s for $6 and found ideas for the spooky drawings online. After deciding not to pay $20 for 10 custom Halloween Stamps (ridiculous right?) I went with a spooky black and white stamp of Ingrid Bergman from good ‘ol USPS.com.

The attraction for this party was the 1987 horror flick: Monster Squad which meant I had to include a mini movie poster and of course Halloween Themed ticket stubs which I found on Etsy for super cheap!

Step 3: Cute Indoor Decor

Halloween decorations are usually either pretty gross or painfully cute but luckily after some consistent searching I found some more modern/classy alternatives through Zurchers and Zulilly.com. Always buy on-sale, especially paper fans – Do not pay $25 for those, seriously.

My living room is all drapes and windows so I went with hanging decorations like a paper chain, pennants, fans, etc. I love how everything turned out and I’m hoping I can at least save the fans and sparkle Halloween sign for next year. I’m afraid the paper chain might get destroyed in a box — but hey it was on sale and recyclable!

Step 4: Decorating Outside

Our Jack-O-Lanterns turned out perfectly thanks to the help of Ali, Helaman and dad. Teddy gorged himself on a few handfuls of guts and I must say that the “Pumpkin Gutter” was an excellent purchase. Ultimately it took just as long to gut the pumpkin with a power drill as by hand, but it was 10x as fun and didn’t involve me getting sticky.

Did I power drill carve that glowing pumpkin down in front? Why yes I did, and I have some quick tips for any of you out there looking to do the same next year:

  1. Be sure to charge your drill battery well in advance
  2. Your power drill will get pumpkin guts in it so plan on rinsing it off
  3. Please take the batteries out/unplug your drill before rinsing it off
  4. Try varied bit sizes for more creative designs
  5. Hand exercises at the gym are optional, but may increase your drilling resiliency

I covered my door in some paper bats and used orange lights and fall leaf garland to decorate the rail. The little cat lantern was a cute find from Walmart last year.

Window silhouettes came during a moment of weakness where honestly I could have stopped while I was ahead, but hey, Pinterest called and I had some extra paper bats and black garbage bags. I cut them out by hand — I know some of you might be hating me right now — but honestly look at them, they aren’t perfect and garbage bags are hard to trace a pattern onto. I also made a little cat silhouette, but looks like I missed a picture for that window.

Step 5: Munchies!

Everyone loves food right? Mummified Pigs in a Blanket, Gooey Monster Cookies and Candy Corn colored Veggies were our choice for the evening. The Cherry Limeade was red. Red=Blood. It works. Thanks to Rachel for the Bloody Popcorn that showed up later! I ended up using some left over orange fabric from Ali’s costume (yes I did that too, remember I like big projects) as a makeshift table cloth and found the paper products at Walmart.

Step 6: Costumes

All of our guests were required to wear costumes and while I failed at taking pictures of them I can say that we had the following in attendance:

  • Superman
  • Batgirl
  • Pirate
  • U.S. AirForce Cadet
  • 2 Rock Stars
  • Police Woman
  • Cowboy
  • The main characters of Breaking Bad
  • Skull Kid
  • Link
  • Zelda Cuckoo

The Masterson family made up the Zelda tribute which is where my first ever sewn pair of pants and a t-shirt came into play. I admit to buying mine and teddy’s costumes but a $400 Majora’s Mask was a bit of a stretch for this year’s budget 😉 😉 (had to buy those invitations didn’t I?). So I did what my mom taught me and I made one myself!

Majora’s Mask was quite the adventure and took about month to complete. The hardest part was layers upon layers of paper mache (thanks to the Universe) and the spikes (thank you YouTube!). Painting it was honestly the fun and easy part and made me appreciate my kitchen counters, because bending over at a table is murder on your back. All-in-all it’s not something that’ll last for years, but it was super fun to do and Ali was happy with the result.

Some final thoughts:


Did I go a little crazy with this year’s Masterson Halloween party?

-Yes.

Did I have fun planning and putting it together?

-Heck yes!

Did I save money?

-Totally!

Do you have to have a crazy detailed Halloween party too?

-Heck no!

I planned this event because I wanted to do something a little over the top this year and to get my creative juices flowing. It was super fun – which is the most important reason to throw a party and I hope everyone who made it had a good time too!

My final question — Did I succeed at throwing a cute, fun and classy Halloween party?

-That’s for you to decide, leave a comment! Tell me what you think!

Share Button

Use Facebook to Comment on this Post

My biggest Halloween mistake & what I’m doing differently this year

Share Button

Every year I make the same mistake of carving Halloween pumpkins long before Halloween. I have the vision in my mind that they’ll be perfect for my Trick-or-Treaters until about 7 days later when they’ve turned into moldy, mushy, ew. This year I finally got up the strength to resist my desire to carve and have replaced it with planning my decorations for Halloween night, which you will only see if you’re lucky to drive by my house Halloween night. Just kidding, I’ll be taking pictures, but seriously all friends with children, bring your kids by my house, please!! If just to give me the honor of giving them my candy. The past 2 years we’ve had almost no one stop by, but that’s likely because there haven’t been any families living nearby. This year though, I’m determined! Determined to mark my house as Trick-or-Treatable!

So, how again, am I solving this year’s pumpkin carving dilemma? It’s painfully simple:

I’m not carving pumpkins until the week of Halloween! And until then, I have this gorgeous pile of squash doing exactly what I would want my Jack-O-Lanterns to be doing on Halloween night: looking gorgeous and evoking the holiday’s spirit.

12168934_10153171243951658_272524874_o

Now I know, 5 pumpkins are a bit much to carve, especially the week of Halloween. What with Ali’s Skull Kid costume, working full time and saving hundreds of toilet paper rolls (more on this in a couple posts) how in the world do I have the time? Well let me tell YOU! In my pinteresting adventures I recently came across one of the greatest inventions ever known to man: The Pumpkin Gutter. Yep, it’s a drill bit that carves all the guts out of your pumpkin in just a few swipes, aaaand all you have to do is dump the pumpkin out! Don’t believe me? Check out this video clip:

So yes, next Monday I will be enlisting the help of my brother, my husband and my father to carve 5 pumpkins using the Pumpkin Gutter. And to make things even more exciting we’re going to be putting the drill bits I used to hang my curtains to good use. Seriously, my goal with one or two of these squash buddies is to create something to the effect of well, this:


Phttp://www.17apart.com/2011/10/how-to-drilling-pumpkins.htmlcarve pumpkin powerdrill       Power-Drill-Designs

Share Button

Use Facebook to Comment on this Post

The year we got a pup

Share Button

Masterson Fall 2014 4x6-1It was about 6 months into our marriage when I started talking about the family dog. Honestly Ali knew I wanted a dog from the day I said “Yes”, but we always talked about how it wouldn’t happen until we bought a house first.

I’m laughing to myself now as I write this with Teddy, our Corgi, squeaking an Angry Birds toy in the background (he loves squeaky toys). 

So yes, at about 6 months into marriage I was googling dog breeds. First it was Chihuahuas because I missed my mom’s dog, Lily at home. Then Border Collies because I missed my stepdad’s dog, Tahoe. Then Great Danes because they’re awesome. Mastiffs, Dalmatians, PitBulls (they’re seriously misunderstood and excellent family dogs), Adopting a shelter dog, I was on a Newfoundland kick for a long time because they’re so gentle with children. I grew up with Black Labs and while beautiful I knew I wanted a different breed, especially after living with a Chihuahua for so long. Oh and there was our sweet Honey, my step dad’s St. Bernard. She was a beautiful animal and a wonderful dog. Anyway I digress…

249f5f964422ab47d0b21ae498a1cafbI’d always seen pictures of Corgis online, I mean they’re everywhere these days –not to mention CorgiCon, Corgi Beach Day, etc. I always worried though, that a Corgi would be too active and what about their herding instinct? They’re adorable, but after doing a lot of reading, they really aren’t the best breed for small children, and I plan on getting some of those one day too…so a Corgi was definitely out; until Ali saw a picture of one and Animal Planet’s Dog Breed Selector recommended a Corgi as one of our top breed matches. Yep, it was that easy, and I’m pretty sure it was this picture that sealed the deal with Ali

The next thing I knew I was searching KSL, found a litter of 4 pups and had emailed the breeders about taking one home. He’s the second one from the left in the first picture and the little red head in the front, next to Mom in the second:

658612-1396162675-692301658612-1396931092-471978

We were lucky to find a breeder who would keep Teddy for us until we had moved into dog-friendly housing (yes, I made Ali move for a dog – isn’t he amazing?). We took the pup camping about a month before we brought him home where the poor little guy got sick on his first hike. While this next picture is adorable, it’s really a sick puppy in a backpack coming down the trail.

10420700_10152123219806658_1213755062_o (1)I got past my concerns about kids and Corgis after doing some more research and realizing that ultimately if you’re going to have kids and any kind of dog, you have to teach them both how to interact with each other. We’ve worked really hard to socialize Teddy and teach him basic obedience commands and tricks here and there. I’ve tried to get him used to being touched, held and pulled on and even loud noises. I hope that I can do similarly with my kids. Reminding them that Teddy might bite if they chase him into a corner. Teddy will chase him if they run, because chasing and herding is in his blood. Teddy will also cuddle them, follow them everywhere and ideally protect them at least with his bark.

Ultimately I’ve fallen in love with the Corgi breed and I think Ali has too. While I’m pretty sure he’d rather be with me than Teddy, I do know he appreciates the Corg’s ability to learn tricks quickly and his general obedience.

Today Teddy is about 20 months old. We’ve decided that someday we’ll get a second tri-colored Corgi, but for reals: not until we have a house . . .

Share Button

Use Facebook to Comment on this Post

Meet Pete – The Black Moor fish

Share Button

Pete the black moor fishPete is a black moor fish and he’s supposed to grow to be 8 inches long. With the stress of moving to our new apartment though, Pete got sick. The poor fish had parasites on him, and one started looking like “Hole in head”. We gave him medicine, and also found out that his tank was WAY too small. Apparently goldfish need at least 29 gallons of water to swim in– and well, our Pete was living in only 3 gallons. The pet store said his small tank might have been related to why he was sick, so we started looking for a bigger one.

After a lot of searching we finally found a a tank AND stand for $30!

Needless to say, Pete is very happy and his spots and hole were gone the next day! In a couple of weeks, we’ll be getting Pete a friend. 🙂

PS: Can you spot his googly eyes?

Black Moor Pete happy in his new home

Share Button

Use Facebook to Comment on this Post