 While we only had one little turtle stop by to Trick-or-Treat, he was still adorable. Especially when after saying “Trick-or-Treat” and me taking a while to get the candy bowl, he started stepping into the house asking, “Where’s my treat?”, all while the mortified father patiently repeated, “We don’t do that buddy…we don’t walk into their house…”.
It was adorbs.
I had honestly been planning Halloween since September not really for any particular reason, but more because I just love a good project. You can find all the inspiration for my ideas and actually most of the products I used per my Pinterest board: “A Halloween Movie Scare”.
Step 1: Picking a Theme
My goal for this event was something a little formal, cute and anything but gory. I found just what I was looking for after some Pinterest Pinning, internet shopping and of course browsing for deals. Zazzle.com was my final choice for invitations mostly due to a 20% OFF sale, which they seem to have a lot of.
 Step 2: Invitations
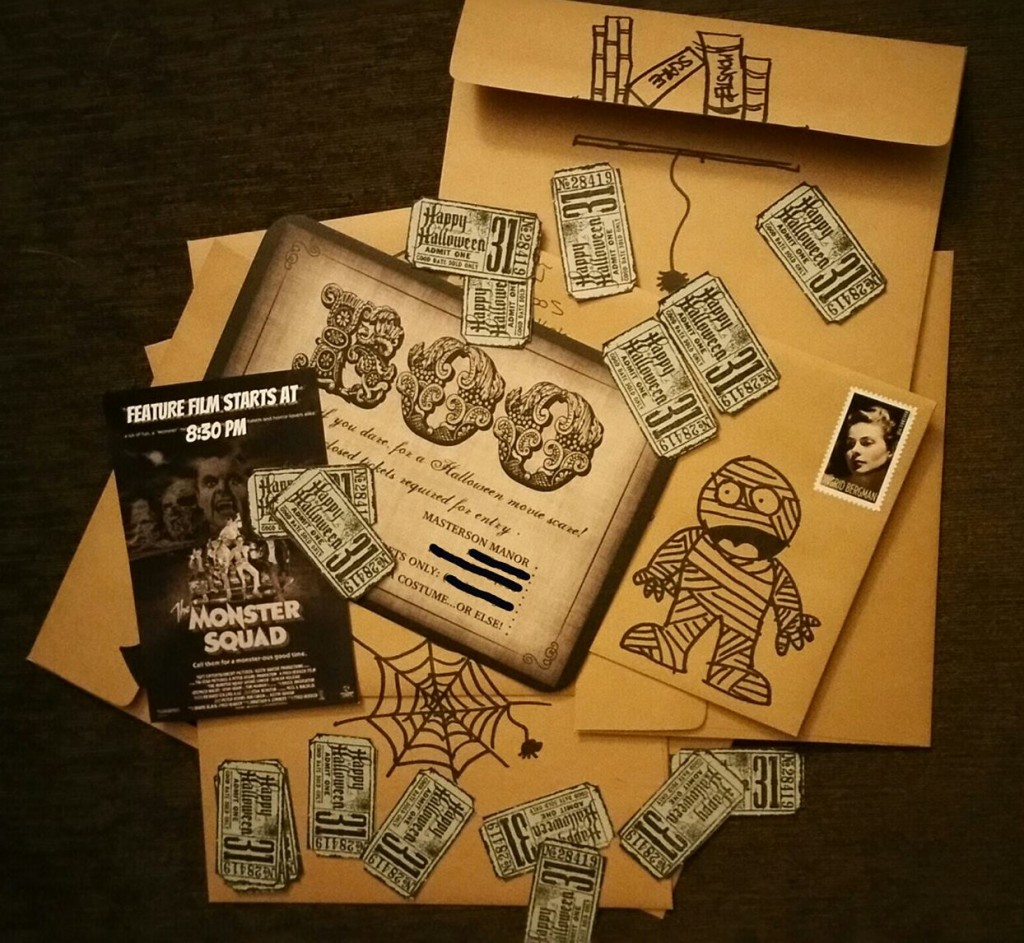
While my invitations did come with their own envelopes (which I didn’t realize when I ordered them), I wanted something a little more interesting than plain white. I came across the brown ones at Jo-Ann’s for $6 and found ideas for the spooky drawings online. After deciding not to pay $20 for 10 custom Halloween Stamps (ridiculous right?) I went with a spooky black and white stamp of Ingrid Bergman from good ‘ol USPS.com.
The attraction for this party was the 1987 horror flick: Monster Squad which meant I had to include a mini movie poster and of course Halloween Themed ticket stubs which I found on Etsy for super cheap!
Step 3: Cute Indoor Decor
Halloween decorations are usually either pretty gross or painfully cute but luckily after some consistent searching I found some more modern/classy alternatives through Zurchers and Zulilly.com. Always buy on-sale, especially paper fans – Do not pay $25 for those, seriously.
My living room is all drapes and windows so I went with hanging decorations like a paper chain, pennants, fans, etc. I love how everything turned out and I’m hoping I can at least save the fans and sparkle Halloween sign for next year. I’m afraid the paper chain might get destroyed in a box — but hey it was on sale and recyclable!
Step 4: Decorating Outside
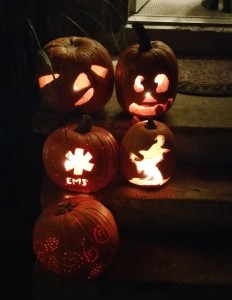
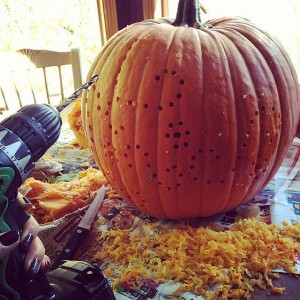
Our Jack-O-Lanterns turned out perfectly thanks to the help of Ali, Helaman and dad. Teddy gorged himself on a few handfuls of guts and I must say that the “Pumpkin Gutter” was an excellent purchase. Ultimately it took just as long to gut the pumpkin with a power drill as by hand, but it was 10x as fun and didn’t involve me getting sticky.
Did I power drill carve that glowing pumpkin down in front? Why yes I did, and I have some quick tips for any of you out there looking to do the same next year:
- Be sure to charge your drill battery well in advance
- Your power drill will get pumpkin guts in it so plan on rinsing it off
- Please take the batteries out/unplug your drill before rinsing it off
- Try varied bit sizes for more creative designs
- Hand exercises at the gym are optional, but may increase your drilling resiliency
I covered my door in some paper bats and used orange lights and fall leaf garland to decorate the rail. The little cat lantern was a cute find from Walmart last year.
Window silhouettes came during a moment of weakness where honestly I could have stopped while I was ahead, but hey, Pinterest called and I had some extra paper bats and black garbage bags. I cut them out by hand — I know some of you might be hating me right now — but honestly look at them, they aren’t perfect and garbage bags are hard to trace a pattern onto. I also made a little cat silhouette, but looks like I missed a picture for that window.
Step 5: Munchies!
Everyone loves food right? Mummified Pigs in a Blanket, Gooey Monster Cookies and Candy Corn colored Veggies were our choice for the evening. The Cherry Limeade was red. Red=Blood. It works. Thanks to Rachel for the Bloody Popcorn that showed up later! I ended up using some left over orange fabric from Ali’s costume (yes I did that too, remember I like big projects) as a makeshift table cloth and found the paper products at Walmart.
Step 6: Costumes
All of our guests were required to wear costumes and while I failed at taking pictures of them I can say that we had the following in attendance:
- Superman
- Batgirl
- Pirate
- U.S. AirForce Cadet
- 2 Rock Stars
- Police Woman
- Cowboy
- The main characters of Breaking Bad
- Skull Kid
- Link
- Zelda Cuckoo
The Masterson family made up the Zelda tribute which is where my first ever sewn pair of pants and a t-shirt came into play. I admit to buying mine and teddy’s costumes but a $400 Majora’s Mask was a bit of a stretch for this year’s budget 😉 😉 (had to buy those invitations didn’t I?). So I did what my mom taught me and I made one myself!
Majora’s Mask was quite the adventure and took about month to complete. The hardest part was layers upon layers of paper mache (thanks to the Universe) and the spikes (thank you YouTube!). Painting it was honestly the fun and easy part and made me appreciate my kitchen counters, because bending over at a table is murder on your back. All-in-all it’s not something that’ll last for years, but it was super fun to do and Ali was happy with the result.
Some final thoughts:
Did I go a little crazy with this year’s Masterson Halloween party?
-Yes.
Did I have fun planning and putting it together?
-Heck yes!
Did I save money?
-Totally!
Do you have to have a crazy detailed Halloween party too?
-Heck no!
I planned this event because I wanted to do something a little over the top this year and to get my creative juices flowing. It was super fun – which is the most important reason to throw a party and I hope everyone who made it had a good time too!
My final question — Did I succeed at throwing a cute, fun and classy Halloween party?
-That’s for you to decide, leave a comment! Tell me what you think!
Use Facebook to Comment on this Post


 I’d like to start off by stating that this is actually not a sponsored post for Zno.com but a true personal review on a pretty sweet deal I found for a free Flush Mount Photo Book 😉 . If I ever do get to the point where I’m writing sponsored posts I’ll be sure to include a disclaimer 🙂 .
 While scrolling through Facebook last month I found a tailored ad for free photo books from Zno.com. Normally I ignore these and continue on to the next corgi video but I gotta tell ya, Facebook is finally getting the hang of things and is really starting to send me stuff I really like (darn it all!). So I of course “clicked” and started reading about some “free trial” for Flush Mount Photo Books that looked pretty flashy. I combed through the fine print and figured out that it indeed was free, minus the shipping and handling, which I felt was pretty fair, all things considered. You do have to stick to their standard print finish and page thickness and only order a book with no more than 16 pages (each “side” is 1 page), but I felt that’d be just right for the project I had in mind and went for it.
 I decided that it was finally time to put together our very own Wedding Photo Book after being married for 3 1/2 years. We made a bunch after the wedding for family members that couldn’t be there, but never got around to printing one just for us. After reading up on Flush Mount Photo Books I decided that I wanted our book to be a little more special and to feature only high quality photos from our special day, our “favorites”, and to tell the story in only 16 pages. Needless to say I was more than impressed with the results and will treasure this book for a long time. If I were to buy this book the total cost would have come to around $50 so at just $10 for shipping, it was definitely worth it.
 Zno.com seems to be all about high quality photo products at affordable prices (the kind of stuff professional photographers try to sell you) and I have to say they hit it right on the money with this one. The disclaimer on their free trial page states that you have to order your free item within 30 days of registering with the site and that they’re offering these free trials for only a limited time so I say jump on the bandwagon now before it’s too late!! I haven’t received any spam mail from them either which is cool – or that might be gmail’s new “promotions” tab feature doing it’s job 😉 .
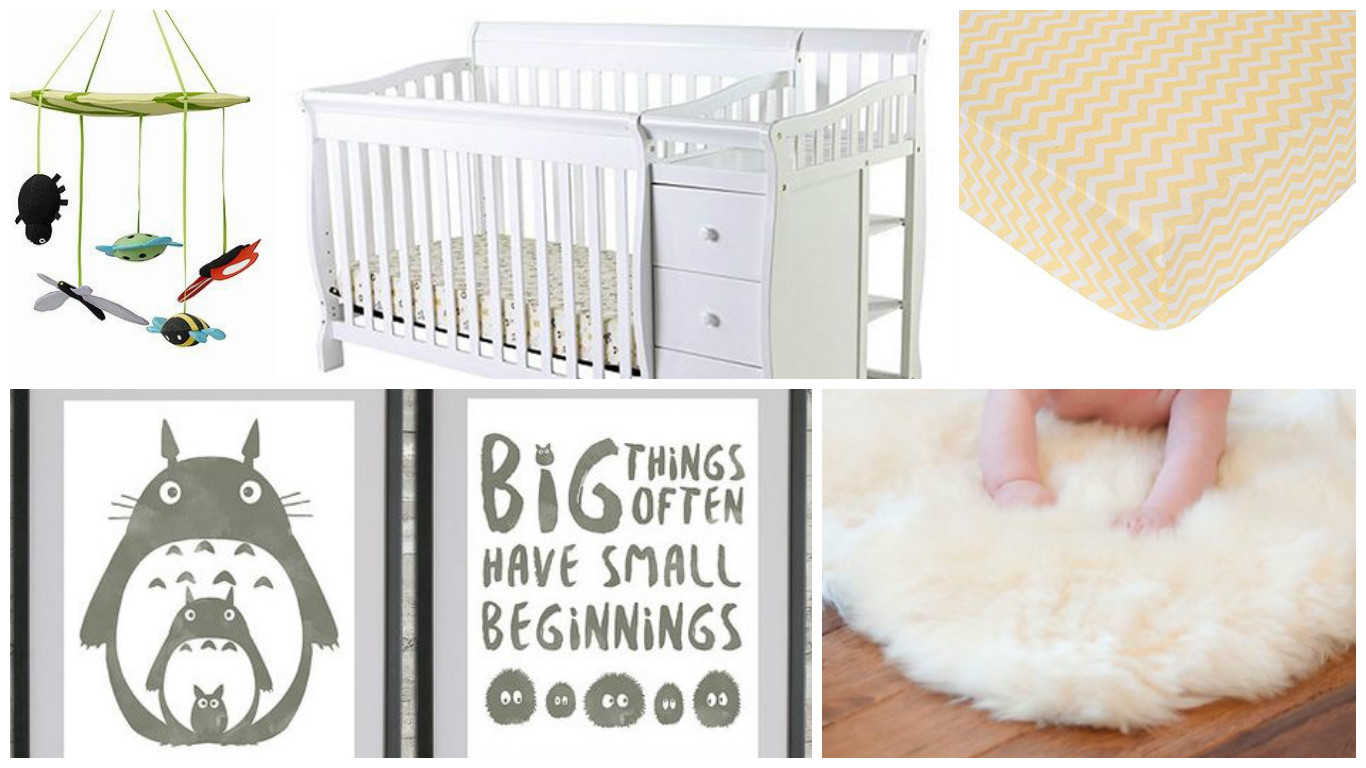
 I’ve kinda been sold and have put together Lydia’s baby album already (hospital and newborn shots) – just waiting for the extra moola to purchase it. I want to have at least one special book for each kid, so I better get on buying that before she turn 3 1/2 😉 . I don’t think I’ll do a Flush Mount for the baby book because of all the pages I’m including in it; but their Layflat Books actually look comparable, so I think I’ll go with that.


 I’d always seen pictures of Corgis online, I mean they’re everywhere these days –not to mention